

If you have ridden here for a season, you already know the sound: the hiss and spray of sealant escaping a fresh cut, usually somewhere inconvenient and usually on a tyre you only just fitted. Queenstown’s schist is world-class to ride and brutal on rubber, and getting your tyres sorted is the difference between riding all weekend and spending it in the bike shop. Here is what the terrain does to tyres, and how we set up to survive it — no brand loyalty required, just the categories and habits that hold up on local rock.
Why Schist Eats Tyres
The Rock That Cuts
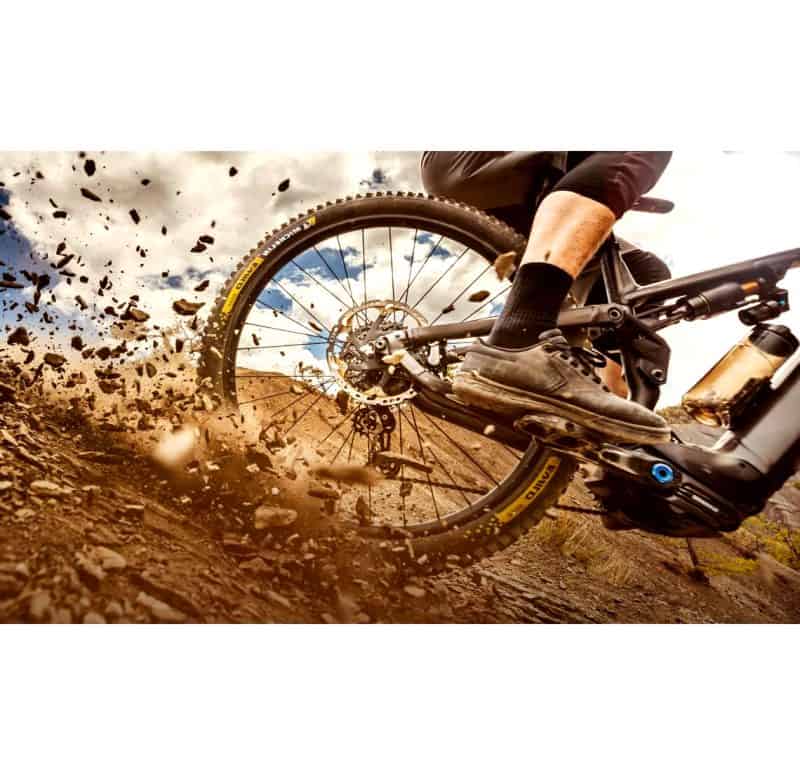
Queenstown’s trails are built on schist — the grey, flaky rock that splits into plates with edges like broken crockery. It is grippy, fast and photogenic, and it is murder on tyres. Where a clay or loam trail wears your knobs down gently, schist goes after the sidewall: a square-edged rock at the wrong angle opens a slice that no amount of pumping will fix.
We have all stood beside a Coronet shuttle lap watching sealant spray out of a cut the size of a fingernail. The terrain does not care how new your tyre is. Sharp rock is the single biggest cause of ride-ending punctures here, well ahead of thorns or glass, which barely feature. Once you accept that, every setup choice that follows starts to make sense.
Pinch Flats and the Square-Edge Hit
The other local classic is the pinch — that double-snakebite tear you get when a rock edge mashes the tyre flat against the rim. It happens on the fast, chattery sections where you are carrying speed over loose rubble and clip a buried square edge you never saw under the dust.
Run your pressures too low without support and the rim does the cutting for the rock. Run them too high and the tyre skates and still cuts. Most of setting a bike up for here is finding the narrow band in between, and giving the tyre enough structure that a hard hit deforms instead of slicing. That balance is the whole game, and it is why a tube-and-hope setup struggles on this terrain.
Why Tubeless Is Not Optional Here
Sealant Does the Small Stuff
Going tubeless means ditching the inner tube and sealing the tyre to the rim, with a few millilitres of liquid sealant sloshing around inside. The sealant’s job is to plug small punctures the instant they happen — the pinhole, the weep from a minor cut — drying into a plug as the air pushes it into the hole.
On schist, that means a huge number of the nicks that would have flatted a tube simply seal themselves while you keep riding, often without you noticing until you spot the little spooge mark later. A tube turns every one of those into a trailside repair in the cold with numb fingers. The maths is not close.
Lower Pressures, More Grip and Protection
The bigger win is pressure. Without a tube to pinch, you can run noticeably softer, and that does two things at once: the tyre wraps around rock for grip instead of skating off it, and it soaks up square-edge hits that would otherwise pinch.
On dusty, marble-over-concrete summer trails, that extra grip is the difference between holding a line and washing the front into the tussock. Tubeless is the foundation that lets every other choice — pressure, casing, inserts — actually work. It is the first thing we set up on any bike that is going to see real Queenstown dirt, no exceptions.
Building a Setup That Survives
Casing Is the Part That Matters Most
Tyres come in a range of casing toughness, usually described by how many layers of fabric are in the sidewall and how much rubber reinforces them. A light, supple casing rolls fast and feels lovely on smooth trails — and gets shredded in a season here.
A burlier casing weighs more and rolls a fraction slower, and it is the right call for almost everyone riding rock this sharp. Think in terms of casing category rather than chasing grams: the lightest fast-rolling option is a false economy when you are buying two tyres a season. For most local riding, a reinforced trail or enduro casing front and rear is the honest baseline, whatever badge happens to be on it.
Inserts: What They Do and When They Earn It
A tyre insert is a foam ring that sits inside the tyre around the rim. It does two jobs: it cushions the rim from square-edge hits — fewer pinch cuts and dented rims — and it lets you run lower pressure without the tyre folding in corners.
The trade-off is weight, a fiddlier setup, and more faff at sealant-refill time. For an easygoing lakeside rider they are overkill. For anyone doing repeat Coronet or Skyline shuttle laps, or hitting the rough fast, an insert in at least the rear pays for itself in saved rims and saved tyres over a summer. Match the protection to the riding, not to what the fast crowd runs.
Tread and Compound for Dust and Rock
Queenstown’s surface swings from hero dirt in the shoulder seasons to dry, dusty marbles in midsummer, so grip comes from tread design and rubber as much as from any single magic tyre. A reasonably aggressive front with well-supported side knobs helps the tyre bite when the top layer is loose over hard schist.
Softer rubber compounds grip better and wear faster — a fair trade on the front, less so on the rear, where many riders run a harder, faster-wearing compound to survive the rock. The general pattern — grippier and tougher up front, harder-wearing out back — holds up well on local terrain, and it is a more useful way to choose than reading reviews.
Pressure, Sealant and the Trailside Save
Finding Your Pressure
There is no single right number, because it depends on your weight, your casing, whether you run inserts, and how hard you ride. The method that works: start in the middle of the range printed on the tyre, then drop a couple of psi at a time over a few rides until you feel the tyre squirm or burp in corners, then add a touch back.
Heavier riders and rear tyres want more; lighter riders and front tyres want less. A floor pump with an accurate gauge is worth more than any upgrade when a couple of psi changes the whole ride. Re-check before every ride, because tubeless tyres breathe air out faster than tubes do.
Keeping Sealant Alive in a Dry Climate
Sealant dries out, and Queenstown’s dry air and big temperature swings speed that up. A tyre that sealed beautifully in autumn can be a crusty, useless mess by late summer if you never topped it up.
Check every couple of months: pop the bead or use a dipstick, and add a refresh when it is getting thin. Dried sealant also cakes into rubbery clumps inside the tyre — harmless, but worth cleaning out at tyre-change time. Neglected sealant is the quiet reason a so-called tubeless tyre suddenly flats like a tube on the one day you skipped the check.
Carry a Plug Kit, and Know How to Use It
Even a perfect setup meets a cut too big for sealant eventually. A tyre plug kit — the little sticky strips you jam into the hole — fixes most of those in under a minute without taking the wheel off, and it is the most useful thing in your pack here.
Practise once at home so you are not learning on the side of the Shotover in fading light. Carry a spare tube as well, for the gash that even a plug will not hold; when tubeless finally gives up, a tube still gets you home. That layered approach — sealant, then plug, then tube — is how locals avoid the long walk out, and it works far better than hoping.
None of this is about spending the most money. It is about understanding what schist does to a tyre and building a setup that expects it: tubeless as the foundation, a casing tough enough for the rock, pressure low enough to grip but supported enough not to pinch, sealant kept fresh, and a plug kit in your pack for the day it all goes sideways anyway. Get those right and you will spend a lot less time at the side of the trail and a lot more time riding the best dirt in the country. Set it up once, check it often, and the rock loses most of its bite.